If you have a Trieste then you know how frustrating they can be to tune for better breathing performance. Some said it just couldn't be done. That just got my stubborn streak fired up, and I was determined to make mine fun to dive with. After trying every trick I could think of from lots of years of reg repair, I came to the conclusion that it just wasn't going to happen using all of the original components.
1. The diaphragm shape was wrong. The dome or arch-shape of the original is self-supporting, resisting the depression needed to easily activate the demand lever. It accounted for a large percentage of the inhalation effort. Not finding anything available in the diameter needed, I decided to make my own.
2. The other thing that struck me was that the second stage spring tension was too great, but could be easily adjusted by backing out the 2nd stage body by one to two turns in half-turn increments. That worked out fine until I tried putting the diaphragm back in place... immediate free flow. The diaphragm just was not tall enough to allow the 2nd stage to be backed out without activating the lever (without lowering the lever adjustment, which would adversely affect airflow) So the new diaphragm would also have to be taller in addition to being shaped differently.
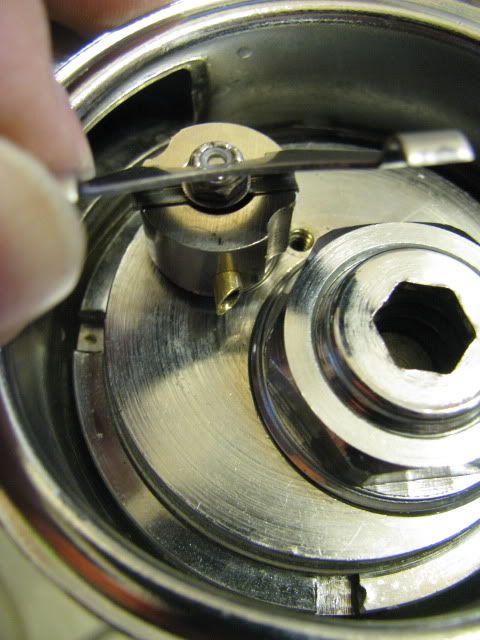
3. The 2nd stage has a retaining setscrew that doesn't fit well enough to keep the body from turning several degrees either way. That could cause variation in the venturi if the body turned and the air port did not aim straight into the air horn. Another potential problem with the movement of the second stage also became apparent... The lever tips could move far enough from center to drag slightly on the rubber of the diaphragm beside the SS disc that they should slide on. That could produce a lot of drag, drastically increasing inhalation effort. That was corrected with the addition of washers that I shaped to just exactly fit the index groove in the second stage. Photos below will make this more easily understood.
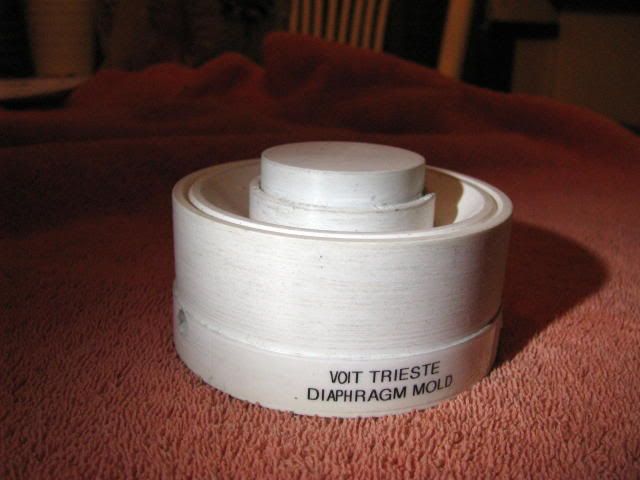
This mold was made with a height-adjustable center. You might like to experiment with the height, but a good starting point may be about 0.25" taller than the Voit original. (I can't find the original or I would measure the difference) This will give you some room to unscrew the 2nd stage body a couple of turns for reduced spring tension.
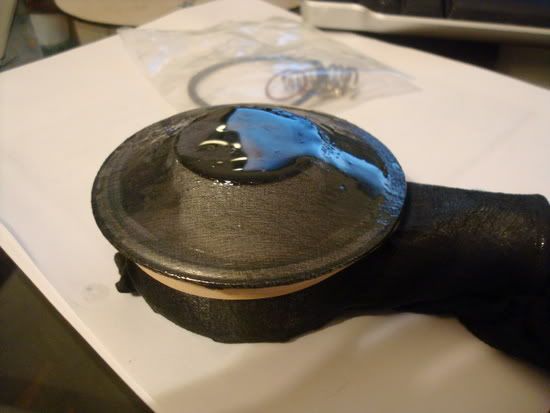
Note the concave shape of the diaphram between the center disc and the outer edge. This shape lets the diaphragm flex more easily than the dome shaped original. Here the sheer nylon material (yeah, it's pantyhose) is stretched over and held in place with rubber bands, and has already received the first coat of Permatex "flowable" Silicone windshield sealant, applied evenly by fingertips.

After two or three coats have cured, the diaph can be removed from the mold, and two coats applied to the inner side in the same manner, curing between coats. The SS disc is placed into the freshly applied silicone. The original disc is about 1.5" in diameter, but I preferred a slightly larger one to keep the lever tips from having any chance to touch the rubber part of the diaphragm. I used a 1.63" disc from the diaphragm of a 1980's USD single hose plastic bodied second stage.
The diaphragm outer edge is trimmed to size. On each side an additional 2 coats are applied to about 1/4" of the outer rim of the new diaphragm, making it thicker for the cans to seal on securely, then left to cure. After sandwiching the fully cured diaphragm into the cans and applying the band clamp for a couple of days, the outer edge that is held by the cans will take on the shape of the ridge in the can edges. If you feel like the new diaphragm is not held securely enough by the cans, you can apply additional coats of silicone to the outer rim as needed.
Check out this NEW IDEA from Macado:
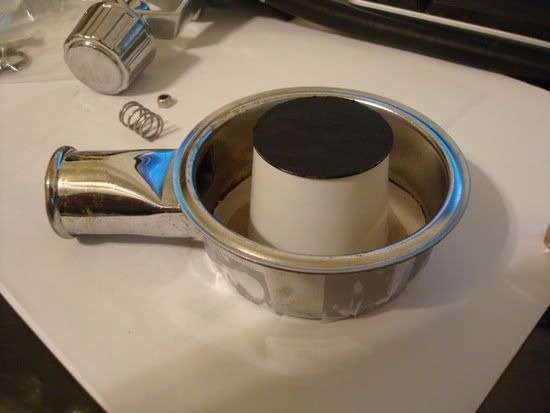
He has simplified the whole process by using the can as the body of the mold!
The center "post" height of his "mold" is probably still experimental at this point, but maybe he can give us specs after he tests the reg out. Great idea, Mike, and now I wonder why I went to all the trouble making that mold of mine!
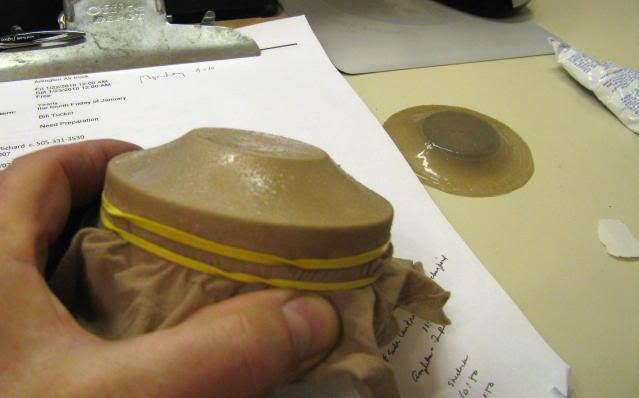
Here Macado has stretched the reinforcing material over the mold and begun the application of flowable silicone. I like the black material. (I wonder if his wife has missed her apparral yet)
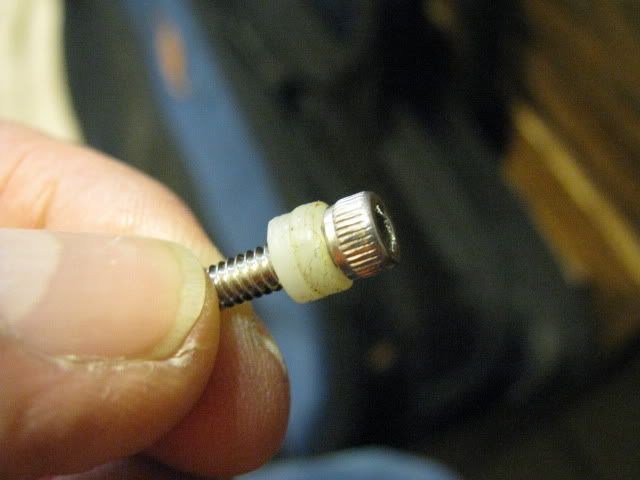
This is the 2nd stage body setscrew with a couple of nylon washers added. I had to shape them a little to fit snugly in the index groove on the body.
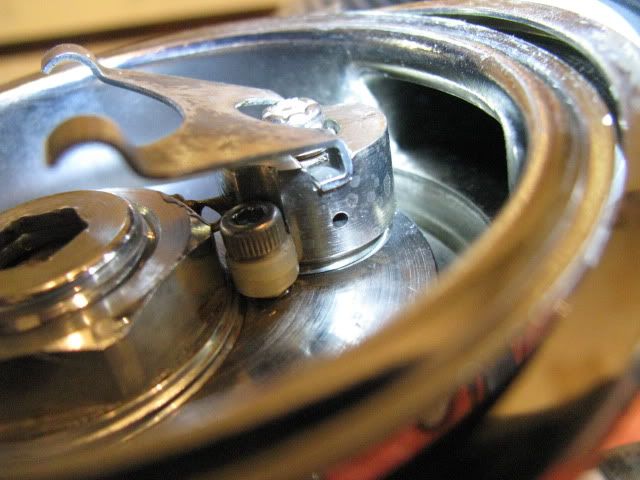
Here is the setscrew with washers installed. The second stage body can't move around now. You can also see the body threads are exposed after backing it out 1.5 to 2 turns.
Tuning tips: Once you make, or otherwise obtain a diaphragm, and have your alignment washer(s) made, you can begin to fine tune your Trieste. I do recommend that you also replace the HP seat/poppett with the Aqualung seat available from VDH, and also start with a new LP seat disc. Set your intermediate pressure at about 130-135 for now. BTW, using the Aqualung seat may require a change in the pin that pushes it. Greg Barlow suggests the pin length should be 0.630”, or that the overall length of the pin and poppet assembled be 0.772” to 0.780”.
With the 2nd stage body completely assembled, including the lever and hand-tightened nut, screw the assembly into the main regulator body. Lift the lever as you turn, so that the new LP seat will not turn against the orifice and get cut. Turn in until it stops, then set the IP to 130-135 psi. Then back out the 2nd stage to where the first alignment groove lines up with the setscrew hole. Now for a starting point, unscrew the assembly by 2 full turns. Don't worry if the lever is pointing the wrong way, just remove the nut and re-position the lever if neeeded. BTW, ignore the little brass tube you see sticking out of the body. That's another experiment.
With the 2nd stage assembly in place you can begin fine tuning. For now, leave the lever adjustment loose so that you have a little free play when you lift and drop the lever. Place the reg on an air supply and gently turn it on to see if the 2nd stage seat holds pressure without leaking. If it leaks and you still have some free play in the lever adjustment, you will have to turn the assembly in by 1/2 turn. Remember to lift the lever so that the LP seat is off the orifice before turning. Now turn on the air again and see if it holds pressure.
If the LP seat is holding, you may now adjust the nut until you have about 1/16" free play with the air turned on. (If the nylon stop on the nut is not engaged with the male threads be sure to use loctite or other suitable precautions once you have your final adjustments made.) Install the set screw with washer(s) to secure the assembly in position. Place your diaphragm in position, and hold the exhaust can in place while you try breathing off the mouthpiece. Several factors are now adjustable to fine tune the breathing. You may want to raise or lower the lever and/or raise or lower the IP and see what results. If you have a manometer or Magnahelic gauge check the cracking effort. You should be able to get it between 0.5" and 0.8" with the diaphragm and adjustments described. It will rise beyond that as you continue to inhale normally, and may then drop back down some as the venturi begins to operate. Raising the IP seems to increase the venturi effect.
I also removed the inhaling valve from my mouthpiece to help reduce drag and turbulence, and found that made for slightly smoother breathing. My next step was to cut out the spokes in my wagonwheel, gaining an additional but slight advantage. Not everyone will feel comfortable diving without the inlet valve, but so far I have had no problems with it.
These changes did not involve any permanent modifications to my Trieste, but they resulted in much better performance that finally made it fun to dive with. I doubt that my current version breathes as well as it would if I had used larger regulator cans, but I really wanted to keep my Trieste as close to original as I could... and if I could just find my original diaphragm, I could return it to the original state in 15 minutes.
There are simple changes in the venturi that I have experimented with that result in even higher performance, but it has been difficult to fine tune it where no air is lost out the exhaust during a heavy inhalation. It's still “experimental” and maybe the subject of a future post.